As promised, here is a very crude tutorial. I started taking pictures at the beginning of the project, but I must have forgot I was going to do a tut, or I was way to tired (probably a little of both) So I'll apologize for only half the tutorial having pictures.
Supplies (for one stalk):
-3/4-1" wooden dowel
-green flannel- 1/4 yd
-dark green felt- 1/4 yd
-medium green felt- 1/4 yd or 3 precut squares
-golden yellow felt- 1/4 yd or 3 precut squares
-cream felt- 1 precut square or scrap
-velcro
-16 gage wire
-green thread
-orange thread
Steps for Stalks:
1. Cut your wooden dowel to 24" long.
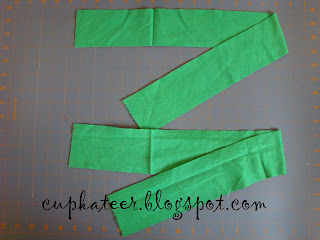
2. Cut a piece of green flannel 2.5" x 26". I was making 2 stalks so 2 strips of flannel are pictured, but you only need one.
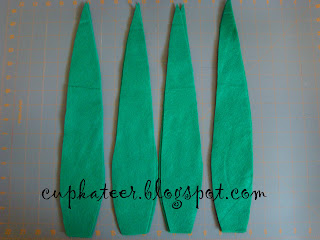
3. Create a pattern for your leaves. I traced an actual leaf from a corn stalk in my garden but you could just eyeball it to a similar shape. Cut 12 leafs out of dark green flannel for each stalk.
These next steps do not have pictures. Sorry :(
4. Sew 2 leafs together with a 1/8" seam allowance.
5. Sew 2 parallel lines 1/4" apart centered lengthwise down your leaf. Insert a piece of wire into the casing you just made. The wire does not need to be the same length as the leaves. My wire was about 12" long. After your wire has been inserted make a small stitch at the bottom of the casing to keep the wire from escaping. Repeat to make 6 leaves.
6.Making the tassels: Cut your cream felt with pinking sheers into 1" by 6" pieces. Attach the tassels to your green flannel using
this (step 7) method.
7. Randomly sew your leave onto the green flannel leaving 1/2" seam allowance on your flannel. I did 2 rows of zigzag to attach my leaves. One row at the bottom of the leaf and the other row at the bottom of the wire. Stitch across the entire width of the leaf.
8. Sew 3- 1" squares of hook velcro to the flannel above three of the leafs. This velcro will hold the cobs.
9. Using a ladder stitch, hand sew (sorry) the flannel around the dowel.
10. Optional: After finishing I was having a hard time getting my stalks to balance in the dirt. I cut a 3" x 3" piece of wood and nailed it to the bottom of the stalks. This helps balance the stalks.
Cobs You will need 3 cobs for each stalk:
1. Create a pattern for your corn. I just eyeballed a skinny-eyeball-sort-of shape. Fold your precut square of felt into four sections. Trace and cut out your pattern. You will need 3-4 pieces for each cob.
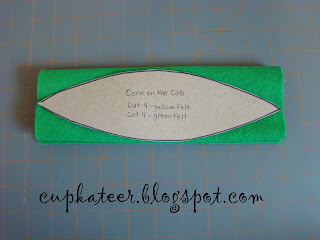
2. Using the same pattern cut 3-4 pieces from golden felt. (I used 4 for this tutorial but when I finished the cob was a little to fat. My other cobs used only 3 pieces)

3. Sew parallel lines 1" apart using orange thread.
4. Following the curve of the felt sew 2 line 3/4-1" in. Sew a straight line down the middle.

5. Using a 1/8" seam allowance sew all 3-4 pieces together. Leave an opening for turning.

6. Turn and stuff. Hand stitch the opening closed.

Husks: Sorry no pics :(
1. Sew a 1" square of loop velcro to 3 of the husk pieces.
2. Using the same number of pieces as you did for the cobs sew with right sides together using a 1/8" seam allowance. Only sew half way up the husk pieces.
3. Turn and stuff corn inside the husk.
4. Attach husk by velcro to the stalk.
I hope this half-picture tutorial makes sense. Leave any question in the comments and I'll be happy to answer them.
Happy Harvest!
I'm participating in...